
Installing gym flooring is a key step to protect your body and your home or commercial space. You might wonder, “What is the best way to lay down gym flooring?” or “Can I do this myself?” Yes, you can! Many types of gym flooring, such as rubber mats, tiles, or rolls, are easy to install, even for a home gym floor DIY project. This guide will show you how to do it right, giving you a tough and safe surface for your workouts. We will cover everything from picking your floor to the final touches, making sure your gym floor installation guide is complete.
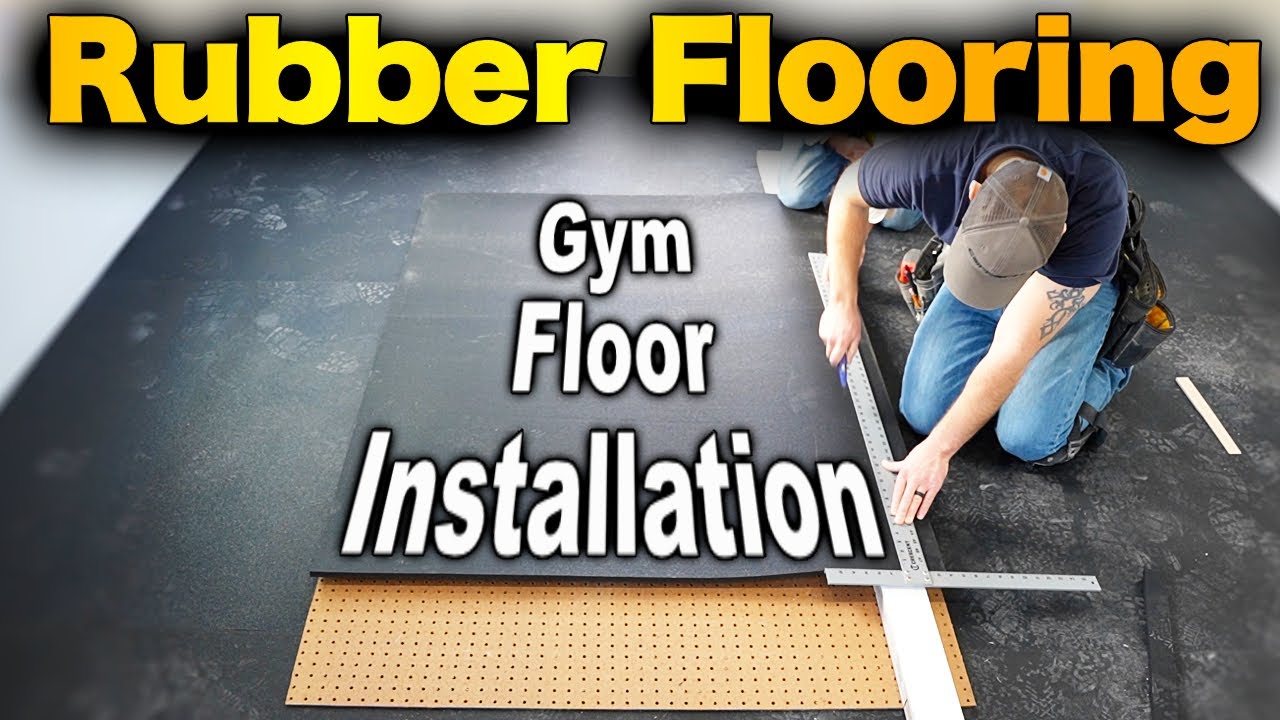
Image Source: i.ytimg.com
Why Your Gym Needs Good Flooring
Think about your workouts. You drop weights. You jump. You sweat. Without good flooring, your floor can get ruined. Your joints can hurt. Gym flooring makes your space safer and stronger. It protects your subfloor, cuts down on noise, and gives you a firm, non-slip area. This is true for a small home gym or a large commercial space.
Picking the Best Gym Floor for You
Choosing the right type of gym flooring is important. Different kinds fit different needs. Here, we look at the main options and what they offer.
H4 Rubber Gym Flooring: A Strong Pick
Rubber is a top choice for gym floors. It is tough and lasts a long time. It can handle heavy weights and lots of foot traffic. This makes it perfect for many gym settings. Rubber comes in different forms: mats, tiles, and rolls. Each has its own way of rubber gym flooring installation.
H5 Advantages of Rubber Flooring
- Protects Your Floor: Rubber cushions impacts. This saves your main floor from damage.
- Safe for You: It lowers the risk of slipping. It also helps your joints during exercise.
- Strong and Lasts Long: Rubber can take a lot of use without wearing out.
- Cuts Noise: It soaks up sound, making your gym quieter.
H4 Interlocking Gym Mat Setup
Interlocking gym mats are like puzzle pieces. They fit together easily. This makes them a great choice for home gym floor DIY projects. They are often made of rubber or foam. Foam mats are lighter and softer, good for bodyweight exercises. Rubber mats are tougher, better for weights.
H5 Perks of Interlocking Mats
- Simple to Install: You just connect them. No glue is needed most times.
- Moveable: You can take them apart and move them if you need to.
- Cost-Effective: Often cheaper for smaller areas.
- DIY Friendly: Perfect for people who want to do it themselves.
H4 Rolled Rubber Flooring Install
Rolled rubber flooring comes in big rolls. This makes it good for covering large areas with few seams. It gives a very smooth look. It is often used in bigger home gyms or commercial gym flooring installation.
H5 Why Choose Rolled Rubber?
- Seamless Look: Fewer gaps mean a smoother surface.
- Uniform Coverage: Covers big areas fast.
- Durable: Very tough, handles heavy use well.
- Professional Finish: Looks very neat and clean.
H4 Other Floor Choices
- Foam Tiles: Soft and light. Good for yoga, stretching, or light cardio. Not for heavy weights.
- Turf (Artificial Grass): Great for sled pushes, sprints, and functional training. Needs proper base.
- Plywood or OSB (Oriented Strand Board): Can be a base for other flooring. Not a gym floor itself.
Planning Your Gym Floor Layout
A good plan makes installation easier. It also saves you money by cutting waste.
H4 Measure Your Space
First, measure the room where your gym will be.
* Measure the length of the room.
* Measure the width of the room.
* Multiply length by width to get the total square footage.
* Add 5-10% extra for cuts and mistakes. This is key for any gym floor installation guide.
H4 Sketch a Gym Mat Layout Tips
Draw a simple map of your gym space.
* Note any odd shapes, doors, or pillars.
* Plan where your mats or rolls will start.
* For interlocking mats, plan to start in a corner. Work your way out.
* For rolled rubber, plan how rolls will lie. Think about cutting them to fit.
* Try to use full pieces where you can. This will cut down on how much you have to cut.
H4 Figure Out How Much Material You Need
Based on your measurements, buy enough flooring.
* If buying mats, check the size of each mat. Divide your total square footage by the mat’s square footage.
* If buying rolls, they come in set widths (like 4 feet). You will buy them by the linear foot. Figure out how many rolls you need based on the length of your room.
Subfloor Prep for Gym Flooring
The base floor, or subfloor, must be ready. This makes sure your gym floor lasts a long time. It also makes it safe. Subfloor prep for gym is often overlooked but it is very important.
H4 Clean the Subfloor
- Sweep and Vacuum: Get rid of all dust, dirt, and debris.
- Mop: Use a mild cleaner to clean the floor. Let it dry completely.
H4 Make the Subfloor Smooth
- Fill Gaps: Use a floor patch compound to fill cracks or holes.
- Level High Spots: Grind down any bumps. A level floor makes the gym flooring lie flat. This stops trips and makes the floor last longer.
H4 Make Sure It’s Dry
- Moisture Check: If your subfloor is concrete, check for moisture. You can use a moisture meter or a simple plastic sheet test. Tape a 2ft x 2ft plastic sheet to the floor. Leave it for 24 hours. If there’s moisture under the plastic, you need a moisture barrier.
- Moisture Barrier: Use a special sealer or a thick plastic sheet. This stops moisture from coming up and hurting your gym floor.
Tools You Will Need
Having the right tools makes the job much easier.
* Tape measure
* Utility knife with extra blades (heavy-duty)
* Straightedge or T-square
* Chalk line or pencil
* Rubber mallet (for interlocking mats)
* Roller or hand tamper (for adhesive floors)
* Trowel (for adhesive)
* Safety glasses and gloves
* Vacuum cleaner
* Heavy-duty cleaner
Your Gym Floor Installation Guide: Step-by-Step
This part covers the main steps for installing your gym floor. We will break it down by the type of flooring.
H4 Acclimating Your Flooring
Before you install, let your flooring get used to the room.
* Unroll or unstack your mats/rolls in the gym space.
* Leave them for at least 24-48 hours. This lets them relax and adjust to the room’s temperature and humidity. It stops shrinking or expanding later.
H4 Interlocking Gym Mat Setup
This is the easiest way to install gym flooring.
1. Find Your Start: Pick a corner of the room. This is usually the best place to begin.
2. Lay the First Mat: Place the first mat in the corner. Make sure two factory edges face the walls.
3. Connect Mats: Take the next mat. Line up its interlocking teeth with the first mat. Push them firmly together. You might need a rubber mallet to tap them tight.
4. Work Across the Room: Continue laying mats row by row. Go across the room, then start a new row.
5. Trim the Edges: When you get to a wall, you will need to cut mats to fit. Turn the mat over. Mark where it overlaps the wall. Use a straightedge and a utility knife to cut it. (More on how to cut gym flooring below).
6. Edge Pieces: If your mats came with edge pieces, add them to the exposed sides. This gives a finished look.
7. Check for Gaps: Make sure all mats are tightly connected. No gaps should be visible.
H4 Rolled Rubber Flooring Install
This method needs more care, especially for larger areas.
- Layout Rolls: Unroll your rubber flooring. Lay it out in the room according to your plan. Overlap the edges slightly (about 1 inch).
- Let it Relax: Let the rolls sit for 24-48 hours. This helps them flatten out.
- Trim Rough Edges: Use a straightedge and utility knife to cut off any rough factory edges where rolls meet. Make sure the edges are clean and straight.
- Dry Lay: Lay all rolls in place without adhesive first. Make sure they fit well. This is your
gym mat layout tipsin action for rolls. - Fold Back Rolls: Once you are happy with the dry fit, fold back half of each roll. Do not fold the entire roll back at once.
- Apply Adhesive (if using): If you need a
gym floor adhesive type, spread it evenly on the subfloor. Use a notched trowel. Follow the adhesive maker’s rules for how much to use and how long to wait. - Lay Down Rubber: Carefully unroll the rubber back onto the adhesive.
- Smooth It Out: Use a heavy roller or hand tamper. Roll over the rubber to push out air bubbles and make sure it sticks well. Roll from the middle out to the edges.
- Seam Treatment: For a truly seamless look, you might use a seam sealer. This is a liquid that fills tiny gaps between rolls.
- Repeat: Do the same for the other half of the roll. Continue this process for all rolls.
- Cure Time: Do not put heavy weights on the floor for at least 24-72 hours. Check the adhesive instructions. This lets the glue set fully.
How to Cut Gym Flooring
Cutting gym flooring can be tricky because it is dense and thick. How to cut gym flooring safely and cleanly is a skill.
- Sharp Blade: Always use a brand new, very sharp utility knife blade. Dull blades make jagged cuts and are more dangerous. Keep many spare blades ready.
- Straightedge is a Must: Use a long, strong metal straightedge or a T-square. This gives you a guide for a perfectly straight cut.
- Measure and Mark: Measure the cut area precisely. Mark the cut line clearly with a pencil or chalk line.
- Score and Snap (Thinner Material): For thinner rubber or foam, you can score the line deeply. Then, bend the material to snap it along the score.
- Multiple Passes (Thicker Material): For thicker rubber (1/2 inch or more), you need to make many cuts.
- Place the straightedge firmly on your mark.
- Apply firm, even pressure.
- Make several passes with the utility knife. Each pass cuts a bit deeper.
- Keep cutting until you are all the way through.
- Safety First: Always cut away from your body. Wear heavy gloves and safety glasses.
- Against a Scrap Board: If cutting small pieces, place a scrap piece of wood or plywood underneath. This protects your subfloor.
Gym Floor Adhesive Type: When and Which One to Use
Do you need glue for your gym floor? Not always. But for some types, it is best. Knowing the right gym floor adhesive type is important.
H4 When to Use Adhesive
- Rolled Rubber Flooring: For a smooth, long-lasting install, especially in commercial settings.
- Heavy Use Areas: If you expect lots of heavy weights or fast movements, glue keeps the floor from shifting.
- Large Commercial Gym Flooring Installation: Adhesion is almost always used here for safety and long-term durability.
- Ramps and Edges: You may glue down the edges of interlocking tiles to keep them from lifting.
H4 When You Might Not Need Adhesive
- Interlocking Tiles/Mats: The interlocking design usually holds them in place, especially with heavy equipment on top.
- Smaller Home Gym Floor DIY: If the space is small and you don’t drop very heavy weights, the weight of the mats themselves can be enough.
- Temporary Installs: If you plan to move the flooring later, no glue is best.
H4 Types of Gym Floor Adhesive
- Urethane Adhesive: Very strong and flexible. Good for high traffic and heavy impact. It bonds well to concrete.
- Acrylic Adhesive: Water-based. Easier to clean up. Less strong than urethane but still good for general use. Often used for lighter rubber or foam.
- Double-Sided Tape (Specific Types): For very light use or temporary installs. Not for heavy-duty gym use. It can sometimes leave residue.
H5 Tips for Using Adhesive
- Read Instructions: Always follow the adhesive maker’s specific steps.
- Ventilate: Many adhesives have strong fumes. Open windows and use fans.
- Spread Evenly: Use the right notched trowel. This makes sure the glue spreads at the correct thickness.
- Tack Time: Some glues need to sit for a short time before you lay the flooring. This is called “tack time.”
- Cure Time: Do not put weight on the floor until the glue has fully cured. This can take 24-72 hours.
Home Gym Floor DIY vs. Commercial Gym Flooring Installation
The steps are similar, but there are some big differences.
H4 Home Gym Floor DIY
- Size: Usually smaller.
- Traffic: Low use, mostly by one or two people.
- Weight: Maybe lighter weights, less frequent drops.
- Subfloor: Often concrete or plywood.
- Goal: Functional, protective, often budget-friendly.
- Installation: Often done by yourself (DIY). Interlocking mats are popular. Adhesives might not be needed.
- Tools: Basic tools are often enough.
H4 Commercial Gym Flooring Installation
- Size: Much larger, often hundreds or thousands of square feet.
- Traffic: High use by many people daily.
- Weight: Very heavy weights, frequent drops, heavy machines.
- Subfloor: Usually concrete, often needing more subfloor prep for gym.
- Goal: Extreme durability, professional look, sound control, safety.
- Installation: Almost always uses rolled rubber. Often needs professional installers. Adhesives are nearly always used.
- Tools: Special heavy rollers, large trowels, and more.
Finishing Your Gym Floor
Once your flooring is down, a few final steps help.
* Clean Up: Vacuum any debris. Wipe down the floor with a mild cleaner.
* Edge Strips: If your flooring came with ramped edge strips, install them now. These make a smooth transition to your other floor. This helps prevent trips.
* Ventilation: If you used adhesive, keep the area well-ventilated for a few days. This helps the glue cure and lets fumes escape.
* Wait: Do not place heavy equipment or start working out right away. Give the floor time to settle, especially if you used adhesive.
Keeping Your Gym Floor Clean
Proper care makes your gym floor last longer and look better.
- Regular Cleaning: Sweep or vacuum often to remove dirt and dust.
- Spot Cleaning: Clean spills right away. Use a mild soap and water.
- Deep Cleaning: Every few months, mop the entire floor. Use a cleaner made for rubber or the specific material of your floor. Do not use harsh chemicals. They can damage the flooring.
- Avoid Oils and Solvents: These can break down rubber.
- Ventilate: Let your gym air out, especially after heavy workouts. This helps with sweat and odors.
Frequently Asked Questions (FAQ)
Q: How long does gym flooring last?
A: Good quality gym flooring can last 10-20 years or even longer. It depends on the material, thickness, and how much it is used.
Q: Can I install gym flooring over carpet?
A: No, it is not a good idea. Carpet is too soft and uneven. It will make your gym floor unstable and can lead to damage. Always remove carpet before installing gym flooring.
Q: Is gym flooring safe for basements?
A: Yes, but you must check for moisture first. Basements can have high humidity. If you have moisture issues, use a moisture barrier before installation.
Q: What thickness of gym flooring do I need?
A:
* 1/4 inch (6mm): Good for cardio, light weights, bodyweight exercises.
* 3/8 inch (9.5mm): Most common for home gyms. Good for general weightlifting.
* 1/2 inch (12.7mm) or thicker: For heavy weightlifting, powerlifting, or commercial gyms. This offers the best protection.
Q: Does gym flooring smell?
A: New rubber flooring can have a “rubbery” smell. This smell usually goes away over time, often within a few weeks. Good ventilation helps it go away faster.
Q: Can I use gym flooring outdoors?
A: Some types of rubber flooring are made for outdoor use. Check the product details. Outdoor flooring needs to resist UV rays and weather.
Q: How do I remove old gym flooring?
A: If it is not glued down, just pull it up. If it is glued, you might need special tools or chemicals to loosen the adhesive. This can be a tough job.
Conclusion
Installing gym flooring is a task you can do yourself. By following this gym floor installation guide, you can create a safe, durable, and good-looking workout space. Whether you choose the ease of interlocking gym mat setup for your home gym floor DIY project, or the seamless finish of rolled rubber flooring install for a commercial gym, proper subfloor prep for gym work and careful cuts will make a big difference. With the right tools, the correct gym floor adhesive type (if needed), and these gym mat layout tips, your gym floor will be ready for years of heavy lifting and hard work.