
Keeping a gym clean is vital. A clean floor makes a gym safer and helps it last longer. People also feel better about working out in a fresh space. The best way to clean a rubber gym floor involves simple steps: remove loose dirt, use a special cleaner made for rubber, mop the floor without using too much water, rinse if needed, and let it dry fully. This process is key for cleaning rubber flooring correctly.
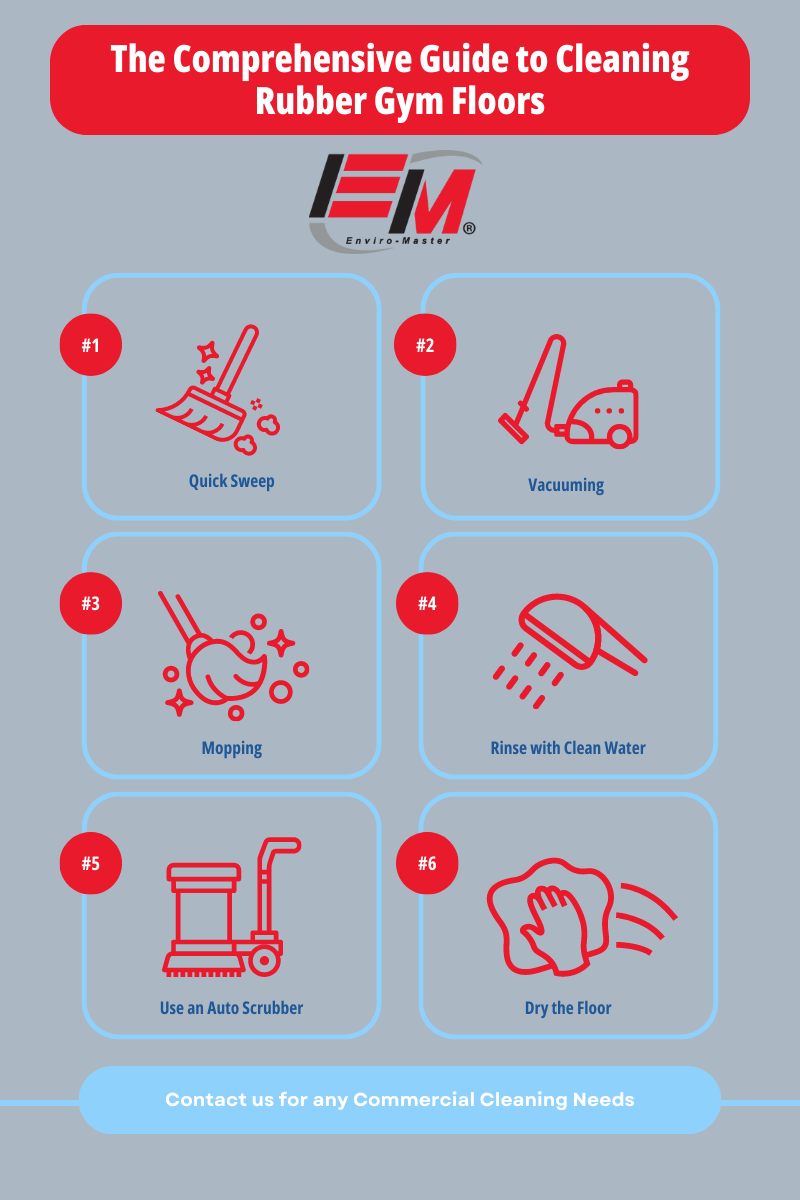
Image Source: enviro-master.com
Why A Clean Gym Floor Matters So Much
A gym floor sees a lot of sweat, dirt, and use every day. Rubber floors are great because they are strong and help prevent injuries. But they can also hold germs. Cleaning them well is not just about making them look nice. It is about keeping people safe and healthy.
Germs and Health
Gyms can be homes for many kinds of germs. Sweat drops, shoe dirt, and skin cells fall onto the floor. If the floor is not cleaned often, these germs can grow. This can spread sickness like athlete’s foot or other skin problems. Regular cleaning and disinfecting gym floors help stop this spread.
Keeping the Floor Strong
Dirt and small stones can act like sandpaper. When people walk or equipment moves on a dirty floor, these bits can scratch the rubber. Over time, this wear can make the floor look old and wear out faster. Proper gym floor maintenance protects your investment.
A Safer Place to Move
A floor sticky with sweat or dirt can be a danger. It can make people slip and fall. Cleaning removes these sticky spots. It helps keep the floor’s grip good. A clean floor is a safer floor for everyone exercising.
Smelling Good
Nobody likes a smelly gym. Sweat and germs create bad smells. Regular cleaning rubber flooring takes away the source of these smells. A clean gym smells fresh and inviting.
What You Need To Start Cleaning
Before you begin cleaning, get all your tools and cleaning supplies ready. Using the right things makes the job easier and does not harm the floor.
Basic Tools
- Soft Broom or Dust Mop: For picking up loose dirt and trash.
- Vacuum Cleaner: A strong one is best, especially for floors with textures or seams. Make sure it works on hard floors.
- Mop: A flat mop or a microfiber mop works well. Avoid mops that leave too much water behind.
- Two Buckets: One for clean cleaning liquid, one for dirty rinse water. This keeps you from putting dirt back on the floor.
- Clean Water: You will need plenty for mixing cleaners and for rinsing.
- Wet Floor Signs: Important to keep people safe while the floor is wet.
Cleaning Supplies
- Rubber Floor Cleaner: You need a cleaner made for rubber. A neutral pH cleaner is often best. Strong chemicals can hurt the rubber. Look for a good
gym floor cleaner solution. - Disinfectant: If you need to kill germs, pick a disinfectant approved for floors and safe for rubber. Check the product label carefully. You might need this for
disinfecting gym floors. - Spray Bottles: Good for spot cleaning or applying disinfectant lightly.
Why The Right Cleaner Matters
Using the wrong cleaner can ruin a rubber floor.
* Strong acids or bases can break down the rubber.
* Cleaners with oil or wax can make the floor slippery.
* Harsh solvents can make the rubber soft or change its color.
A cleaner made for cleaning rubber flooring is pH neutral or slightly alkaline. It cleans without being too strong. Using a proper rubber floor cleaner keeps the floor safe and looking good.
The Step-By-Step Cleaning Process
Now, let’s go through the steps to clean your rubber gym floor the best way.
Step 1: Clear The Area
Move any movable equipment off the floor. Weights, benches, mats – everything that can be moved should be. This lets you clean the whole floor area easily. This is also part of good gym floor maintenance.
Step 2: Get Rid of Loose Stuff
Use your soft broom, dust mop, or vacuum cleaner. Go over the entire floor. Pick up all the dirt, dust, hair, and bits of paper. Paying attention to edges and corners helps a lot. Vacuuming is very good for getting dirt out of the small holes or textures in the rubber. This first step is very important before you use any liquid.
Step 3: Mix Your Cleaner
Fill one bucket with clean water. Add the rubber floor cleaner. Follow the directions on the cleaner bottle for how much to use. Do not use more cleaner than it says. Too much soap can leave a sticky film. This film can attract more dirt later. Use a good gym floor cleaner solution.
Step 4: Mop The Floor
Dip your mop into the bucket with the cleaning mix. Wring out the mop very well. The mop should be damp, not soaking wet. Rubber floors do not like too much water. Water can get into the seams and under the floor. This can cause problems like bad smells or the floor coming loose.
Start mopping in one section. Work your way across the floor. Dip the mop back in the cleaner bucket and wring it out often.
Step 5: Handle Dirty Water
As you mop, the water in your cleaner bucket will get dirty. When it looks muddy, empty it. Fill the bucket again with clean water and cleaner. This keeps you from spreading dirt around.
Also, if you are using two buckets, put the dirty mop water into the second, empty bucket. This keeps your cleaner mix clean longer.
Step 6: Rinse The Floor (If Needed)
Some cleaners need rinsing, others do not. Check the cleaner bottle. If you need to rinse, empty your two buckets. Fill one with clean, plain water. Use a clean mop. Dip the clean mop in the rinse water and wring it out well, just like before. Go over the floor again with the damp, clean mop. This removes any soap left behind. Rinse the mop in the second bucket (now for rinse water) often.
Rinsing well is important if the cleaner leaves any film. A film makes the floor hard to keep clean.
Step 7: Let It Dry
Let the floor dry completely. Open windows or use fans to help it dry faster. Do not let people walk on the wet floor. Wet rubber can be very slippery. This step is just as important as cleaning. Make sure you have wet floor signs up.
Going Deeper: Disinfecting and Sanitizing
Cleaning removes dirt and germs. But sometimes, especially in a gym, you need to do more. You need to kill most germs. This is called disinfecting or sanitizing.
What’s The Difference?
- Cleaning: Takes away dirt, dust, and grime from a surface. It removes germs but does not kill them all.
- Sanitizing: Lowers the number of germs on a surface to a safe level, as judged by public health rules. It kills many germs.
- Disinfecting: Kills most germs, including bacteria and viruses, on a surface. It uses stronger chemicals than sanitizing.
In a gym, disinfecting gym floors is often a good idea, especially in areas with lots of sweat or contact. Sanitizing rubber floors is also helpful for general hygiene.
When To Disinfect
You might want to disinfect:
* After a known illness outbreak in the gym.
* In high-traffic areas regularly (like weightlifting zones or mat areas).
* As part of a deep cleaning plan.
Daily cleaning is important. Disinfecting can be done weekly or less often, depending on how busy your gym is and local health advice.
How To Disinfect Rubber Floors
- Clean First: You must clean the floor thoroughly first using your regular
rubber floor cleaner. Disinfectants do not work well on dirty surfaces. - Choose The Right Product: Use a disinfectant that says it is safe for rubber floors. Many floor disinfectants are available. Check the label to be sure it kills the germs you are worried about.
- Apply The Disinfectant: You can often use a spray bottle or a clean mop. Do not use too much liquid. The floor should be wet with the disinfectant, but not soaked.
- Let It Sit: Disinfectants need time to work. The product label will tell you how long the surface must stay wet. This is called “contact time.” It might be 5 minutes or 10 minutes or more. Let the floor stay wet for the full contact time.
- Rinse (If Needed): Some disinfectants need to be rinsed off with clean water after the contact time. Others do not. Read the product directions carefully.
- Let It Dry: Make sure the floor dries completely before anyone uses it again.
Using the right steps for disinfecting gym floors makes sure you kill germs without harming the floor.
Taking Out Stains
Even with regular cleaning, rubber floors can get stains. Sweat, drink spills, or scuff marks from shoes can happen. Removing stains rubber flooring needs a bit more effort.
Types of Stains and How to Treat Them
- Sweat/Body Oils: These can leave dark or sticky marks.
- Method: Use your regular rubber floor cleaner mixed a bit stronger than usual, or use a cleaner made for body oils. Scrub the spot gently with a soft brush or pad. Wipe clean with a damp cloth and rinse the spot if needed.
- Drink Spills (Soda, Juice): Sugar in drinks can make floors sticky and attract dirt.
- Method: Clean up spills right away! For dried spills, wet the spot with water first. Then use your regular cleaner. Scrub lightly. Rinse well to get rid of all sugar.
- Scuff Marks (From Shoes): These look like black lines.
- Method: Often, you can rub these off with a clean tennis ball or a pencil eraser. For stubborn marks, use a small amount of your rubber floor cleaner or a cleaner made for marks. Rub gently with a non-scratch pad. Test in a small, hidden spot first.
- Food/Grease Stains: Oil or grease can be hard to remove.
- Method: Use a cleaner made to cut grease. Apply a small amount to the spot. Let it sit for a minute (do not let it dry). Scrub gently. Wipe clean and rinse well. Do not use strong solvents like acetone. These will damage the rubber.
- Rubber Marks (From Weights): Dropped weights can leave marks.
- Method: These are often deep marks or cuts, not true stains. If they are just surface marks, try the scuff mark method. Deep marks cannot usually be cleaned away.
Always clean stains as soon as you see them. The longer a stain sits, the harder it is to remove. Test any new cleaning product on a small, hidden area of the floor first. This makes sure it does not hurt the rubber. Removing stains rubber flooring keeps your floor looking its best.
Grasping How Cleaners Work For Rubber
Choosing the right cleaner is key for safe and effective cleaning rubber flooring. We talked about using a rubber floor cleaner with a neutral pH. But what else should you look for in a gym floor cleaner solution?
pH Levels Explained Simply
pH tells us if something is an acid, a base, or neutral. The scale goes from 0 (very acid) to 14 (very base). 7 is neutral, like pure water.
* Acidic cleaners (like vinegar) are below 7. They can be good for rust or mineral deposits, but they can break down rubber over time.
* Alkaline cleaners (like bleach or oven cleaner) are above 7. They are good for grease and oils but can also harm rubber if too strong.
* Neutral cleaners are around 7. These are safest for rubber. They clean dirt and grime without attacking the material itself.
Many good rubber floor cleaner products are made to be pH neutral or just slightly alkaline. This balance lets them clean well without hurting the floor.
Things To Avoid In Cleaners
When picking a gym floor cleaner solution, check the label. Avoid cleaners with:
* Strong Solvents (like acetone, paint thinner): These can dissolve or soften rubber.
* Bleach (in high amounts): While good for killing germs, too much bleach can change the color of rubber or make it brittle. Many floor disinfectants use different chemicals.
* Oil-Based Cleaners or Waxes: These make the floor slippery and hard to clean later.
* Abrasives: Cleaners with tiny scrubbing particles can scratch the rubber surface.
Look for products that specifically say they are safe for rubber floors or recycled rubber.
Example Cleaner Types Table
| Cleaner Type | pH Level (Typically) | Good For | Avoid For Rubber? | Notes |
|---|---|---|---|---|
| General Floor Cleaner | Varies | Light dirt | Check label! | May be too strong or have bad ingredients. |
| Neutral Cleaner | ~7 | General dirt, safe for many surfaces | No | Ideal for cleaning rubber flooring. |
| Alkaline Cleaner | >7 | Grease, heavy dirt | High pH versions | Can be too harsh if not made for rubber. |
| Acidic Cleaner | <7 | Mineral deposits, rust | Yes | Damages rubber. |
| Rubber Floor Cleaner | Neutral or slightly alkaline | General dirt, sweat, light stains | No | Made specifically for this material. |
| Disinfectant | Varies | Killing germs | Check label! | Must be safe for floor after cleaning. |
Choosing the right rubber floor cleaner is a simple step that makes a big difference in protecting your floor.
Best Ways For Specific Areas or Mats
Different parts of a gym floor or different types of mats might need slightly different care. For example, cleaning gym mats used for yoga or stretching might be different from cleaning the main floor.
Cleaning Rubber Tiles or Mats
Smaller rubber mats, like those under weight racks or used for workouts, can sometimes be cleaned outside if they are small and light enough.
* Method: Shake them off first to remove loose dirt. Use a hose to wet them. Scrub gently with a soft brush and your rubber floor cleaner mix. Rinse well with the hose. Prop them up to dry fully in the air and sun (sunlight can help kill some germs, but too much can fade rubber).
* For mats that cannot be moved, clean them just like the main floor: sweep, damp mop with cleaner, rinse if needed, and dry. This is the best way to clean gym mats that are fixed in place.
Cleaning Seamless Rubber Floors
Seamless rubber floors are great because they have no gaps for water or dirt to hide. The basic cleaning steps work very well for these. You have less worry about water getting under the floor.
Cleaning Rubber Floors with Flakes (EPDM Flecks)
Some rubber floors have colored flakes mixed in. These can sometimes make the surface a little more textured. Vacuuming is extra important for these floors to get dirt out of the small spaces around the flakes. Cleaning methods are otherwise the same.
Planning Regular Gym Floor Maintenance
Cleaning is not a one-time job. Regular gym floor maintenance keeps the floor in good shape and makes daily cleaning easier.
Daily Tasks
- Sweep or Vacuum: Go over the entire floor daily to remove loose dirt. This is the most important daily step. It stops dirt from scratching the floor.
- Spot Clean: Clean up spills and stains right away. Keep a spray bottle with diluted cleaner and a cloth handy.
Weekly Tasks
- Full Damp Mop: Clean the entire floor with your rubber floor cleaner and mop, following the steps outlined earlier.
- Clean Edges and Corners: Pay extra attention to these areas where dirt likes to build up.
Periodic Tasks (Monthly or Quarterly)
- Deep Cleaning: Use a slightly stronger cleaner (if safe for rubber) or a floor cleaning machine made for rubber floors. These machines can scrub better than a mop.
- Disinfecting: As discussed, disinfect high-traffic or germ-prone areas.
Commercial Gym Floor Cleaning
For large gyms, doing all this work can be a big job. Many commercial gym floor cleaning services use special machines. These machines can vacuum, scrub with cleaner, and pick up the dirty water quickly. This is called auto-scrubbing.
* Auto-Scrubbers: These machines are efficient but must be used correctly on rubber floors. Use the right pads (not too rough) and the right cleaner. Use very little water and make sure the machine picks it all up. Using too much water with an auto-scrubber is a common mistake.
Whether you clean yourself or hire a service, having a clear plan for gym floor maintenance is key.
Things To Never Do When Cleaning Rubber
Just as important as knowing what to do is knowing what not to do. Avoid these things to protect your rubber floor:
- Using Too Much Water: Rubber floors are not waterproof on the seams. Excess water can get underneath, causing smells, mold, or the floor to come loose. Use a damp mop, not a wet one.
- Using Harsh Chemicals: Avoid cleaners with strong acids, bases, solvents, or high amounts of bleach unless the product is specifically designed and approved for your type of rubber floor.
- Using Abrasive Pads or Brushes: Steel wool, very stiff brushes, or overly aggressive machine pads can scratch and damage the rubber surface.
- Using Oil-Based Cleaners or Waxes: These make the floor slippery and create a film that is hard to remove and attracts dirt.
- Using Steam Cleaners or Power Washers: The high heat and pressure can damage rubber and push water into the subfloor.
- Letting Spills Sit: Clean up spills, especially colored liquids or sugary drinks, right away to prevent stains.
- Not Rinsing Properly: If your cleaner requires rinsing, skipping this step leaves a film that makes the floor look dull and sticky.
- Letting The Floor Stay Wet: Always allow the floor to dry fully before use. Wet rubber is a slipping hazard.
Following these simple “don’t do” rules will help your rubber floor last longer and stay safer.
The Good Things About Keeping It Clean
Let’s quickly look at why all this effort is worth it. Keeping your rubber gym floor properly cleaned and maintained means:
* A Healthier Environment: Fewer germs mean a lower chance of sickness for people using the gym. Disinfecting gym floors plays a big role here.
* A Safer Environment: A clean floor is less likely to be slippery from sweat or sticky from spills. This reduces the risk of falls.
* A Better Looking Gym: Regular cleaning removes dirt, stains, and scuff marks. The floor looks newer and better for longer. Removing stains rubber flooring keeps it looking fresh.
* Protecting Your Money: Proper gym floor maintenance prevents early wear and tear. Your floor will last for years, saving you money on costly repairs or replacement.
* A Welcoming Place: A clean gym is more pleasant to be in. This can make people want to come back.
All these benefits come from following a simple plan for cleaning rubber flooring.
Summarizing The Best Way
The very best way to clean a rubber gym floor safely starts with removing all loose dirt. Then, use a cleaner made for rubber floors (a rubber floor cleaner or gym floor cleaner solution). Mop the floor using a damp mop, not a wet one, to avoid too much water. Rinse if the cleaner needs it. Always let the floor dry fully before anyone walks on it. Add disinfecting gym floors or sanitizing rubber floors to your plan as needed. Deal with stains quickly using the right methods for removing stains rubber flooring. Stick to a regular gym floor maintenance schedule.
By following these steps, whether you are doing it yourself or using commercial gym floor cleaning services, you will keep your rubber floor clean, safe, and strong for a long time. And you will provide a much better space for everyone who uses your gym. This covers the best way to clean gym mats and larger floor areas alike.
Frequently Asked Questions (FAQ)
Can I use bleach to clean my rubber gym floor?
You should be very careful with bleach. High amounts of bleach can harm rubber, changing its color or making it weaker. Some disinfectants safe for floors use different chemicals. If you use a product with bleach, make sure it is very diluted as directed for floors and says it is safe for rubber. Always test a small spot first.
How often should I deep clean my gym floor?
Deep cleaning can be done less often than daily or weekly cleaning. For a busy gym, maybe every month or every three months. For a home gym, maybe only once or twice a year. It depends on how much the floor is used and how dirty it gets.
What is the best way to remove black scuff marks?
Often, you can rub black scuff marks off with a clean tennis ball or a pencil eraser. For harder marks, use a small amount of your regular rubber floor cleaner and a non-scratch pad. Test it first.
Is it okay to use a lot of water for cleaning rubber?
No, using too much water is bad for rubber floors. Water can get into the seams or under the floor. This can cause bad smells, mold growth, or the glue to fail. Use a damp mop that is well wrung out.
How long does a rubber gym floor last?
With good gym floor maintenance, a rubber gym floor can last for many years, often 10 years or more. Proper cleaning is a big part of making it last its full life.
What kind of mop is best for rubber floors?
A microfiber mop or a flat mop that you can wring out well is a good choice. These types help control the amount of water you put on the floor.
What if my rubber floor smells bad even after cleaning?
A bad smell, often like urine or ammonia, can mean moisture or bacteria are trapped under the floor or deep in the rubber pores. This is often caused by using too much water when cleaning or not drying the floor well. Try deep cleaning and possibly using a cleaner made to fight odors or bacteria in porous surfaces, but make sure it is safe for rubber. Sometimes, professional help is needed if the smell is severe.